On later models the plate has mouldings which are clipped into several slots - carefully prise it away starting at one end and working along the length of the locomotive
The layshaft can be seen with its pulley and the original drive belt.
Repairing & maintaining your models
Here are few tips concerning getting or keeping your locos running- if you have any further queries or can add any tips of your own please get in touch.
Replacement of drive belts
Symptoms
On some of the models from the 1970's the motor was mounted on the footplate parallel with the track. The drive was from a pulley on the end of the motor via a rubber belt to a layshaft beneath the loco. This shaft had a similar pulley on one end and a worm gear driving one of the axles. This was an acceptable arrangement except that with age the belts stretched resulting in slipping and hence a loss of drive.
Usually with the loco not on the track, applying 12v to the motor will produce the expected result but after placing the loco on the track the motor runs but the locomotive doesn't move.
Later models had a spur gear on the end of the motor shaft which engaged with a similar gear on the layshaft.
The solution is the change the drive belt if one can obtain them.
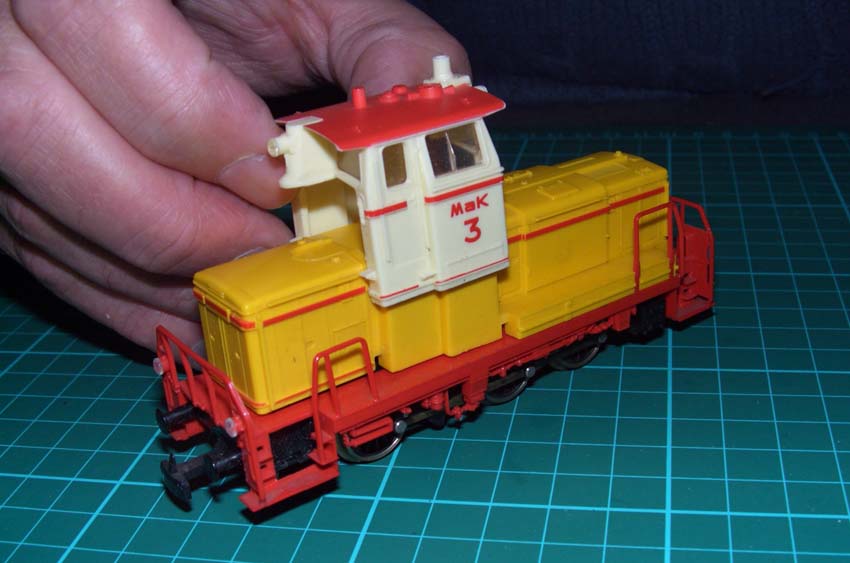
0-6-0 diesel shunters C260 class - click on the picture for a bigger image
|
|
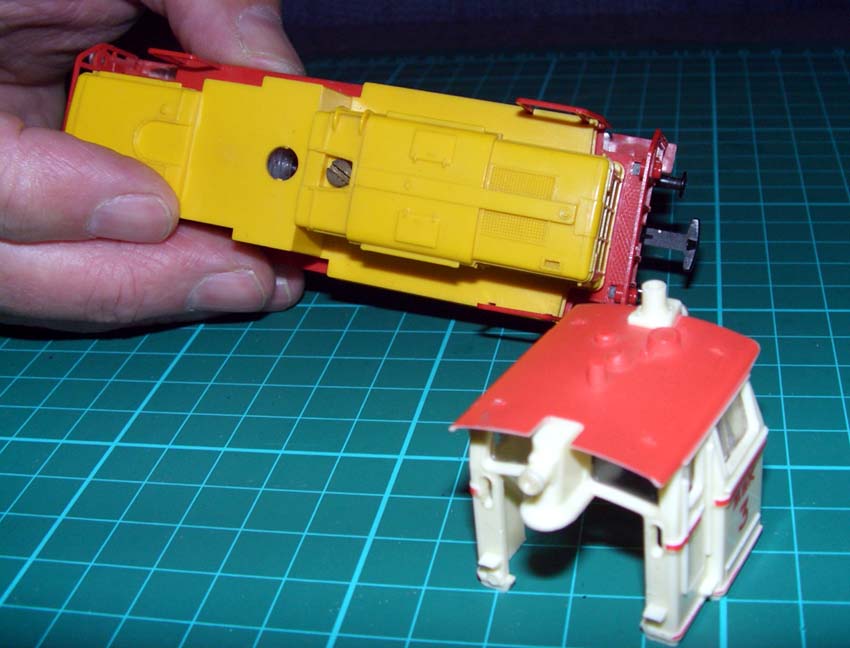
Remove the loco body - on the 0-6-0 shunter the cab needs to be removed first to gain access to the screw holding the body onto the chassis. Carefully prise off the centre cab from the base and lift clear of the body. |
|
|
This will reveal a recessed screw which once removed allows the body to be gently prised from the chassis. This can be done either with or without the footplate |
|
|
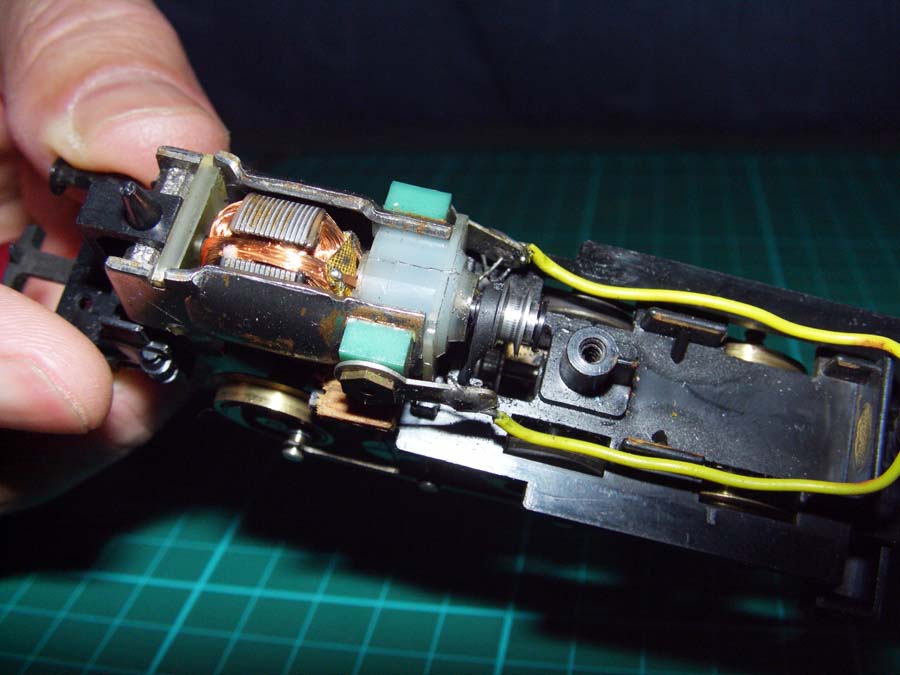
Once removed this allows the belt to be viewed in its motor pulley. (This picture shows the belt off its pulley) |
|
|
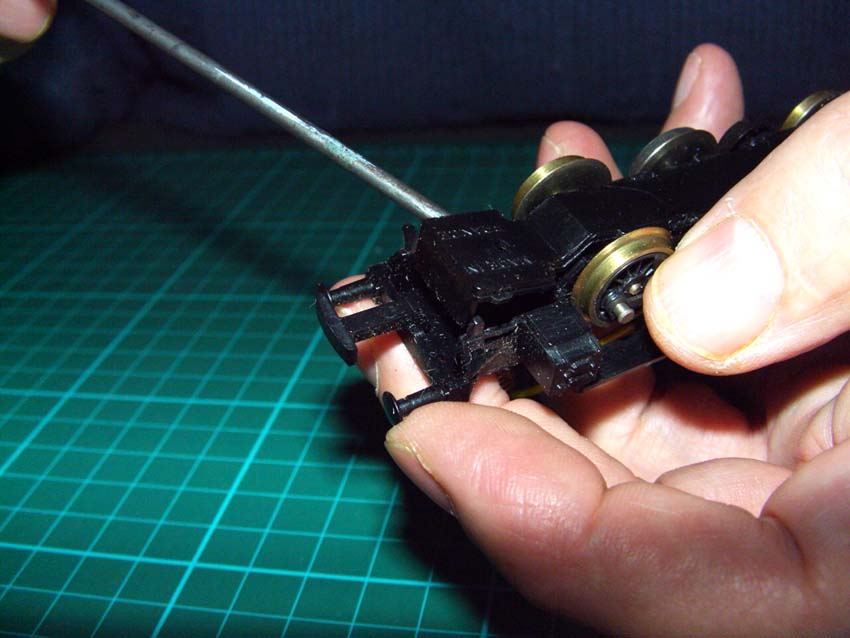
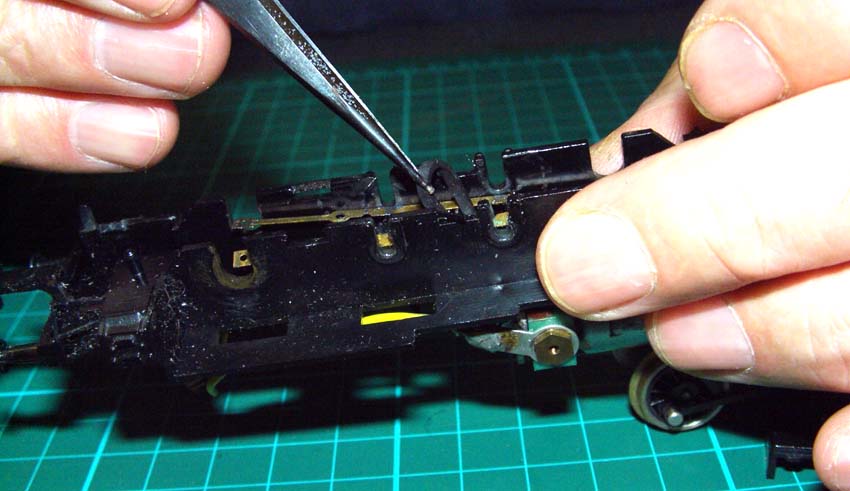
To remove/exchange the belt, turn the loco over and remove the
plastic keeper plate. NB On earlier models this is held on by four small
screws and is easily removed. On later models the plate has mouldings which are clipped into several slots - carefully prise it away starting at one end and working along the length of the locomotive |
|
|
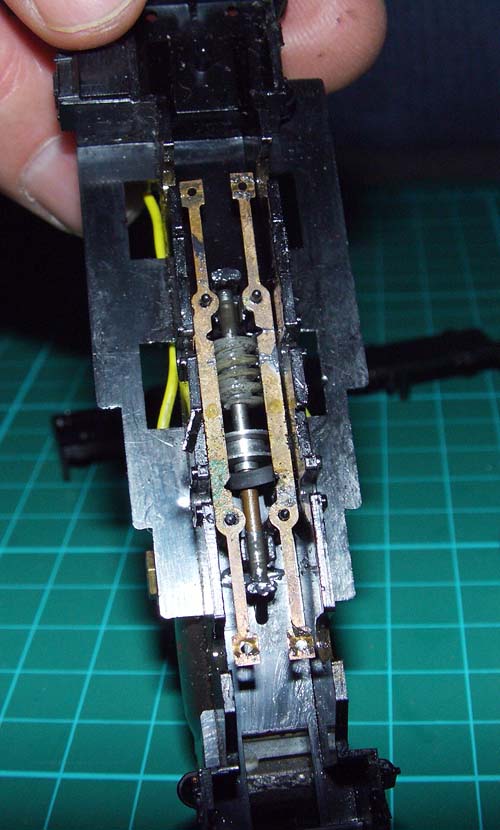
Once this plate is removed it is possible to carefully remove the
wheelsets to give access to the drive belt. On the shunter this is fairly
straightforward as there is no valve gear but on the steam locos this is
not possible. Hence it will be necessary to move just one of the wheelsets
from its bearings to gain access, whilst it is still connected to the
coupling rods. The layshaft can be seen with its pulley and the original drive belt. |
It is now necessary to lift one end of the shaft in order to slacken the tension on the drive belt and hence to remove it from the layshaft pulley.
Turn the loco over and carefully remove the belt from the motor pulley and push it down into the gap below. It may be necessary to remove the motor clip (where fitted) or manoeuvre the pulley end of the motor to remove the tension from the belt. It will become clear once the exercise is carried out.
 |
Turn the loco over again and with the end of the layshaft lifted up to give clearance carefully slide the belt along the shaft and out. Take care not to dislodge the pick up strips |
To quote an oft-used expression 'Replacement is the opposite of removal '
Carefully manoeuvre the new drive belt along the layshaft and slide it over the pulley. Push the belt through the gap towards the motor pulley but keep the visible part on the layshaft pulley. Ensure that the layshaft is correctly located in its bearings and that the pick up strips are in place as the keeper plate engages with these strips
Turn the loco over and carefully replace the belt onto the motor pulley checking that it is correctly located on the layshaft pulley and is not twisted.
Ensure the motor is similarly correctly located in its cradle (with clip if necessary)
Turn the loco over and replace the wheelsets ensuring that they all are in their correct location and there are no snags on the valve gear/couplings rods.
Replace the keeper plate and turn the loco over again.
Re-assemble the body etc and have a cup of tea.
040TA locomotive
The 040TA body is held on by two screws which can be accessed from underneath the chassis at either end of the locomotive. The belt changing procedure is similar.
Replacement of couplings
The original Lanal couplings had part of their structure as a plastic moulding integral with the bogie or vehicle body and cannot be easily replaced.
The 'International' couplings on the models of the early 1970's are held in place by a brass slotted head screw and so are very easy to replace. However some bogie vehicles and locomotives with the couplings on the bogies had their own integral mouldings and fall into the same category as the originals, i.e. virtually impossible to replace.
There are no sources of new couplings but buying models which are beyond repair is one way of acquiring some.
Internal lighting
Locos whose lights don't function can be disassembled and the bulbs replaced. I have used grain-of-wheat bulbs in the past as they are equally bright but don't output as much heat, an advantage with plastic-bodied locos.
Wheelsets
I have had a few problems with wheels moving on the axles of metal-wheeled Jouef stock - the answer is a spot of Superglue. Apparently this is not uncommon.